Understanding Your Car Controls
Get comfortable with pedals, steering, mirrors, gears, dashboard lights, and the core controls you'll use every lesson so you feel calm before you drive.
What You Will Learn
Understanding your car's controls before you drive makes every lesson calmer. This guide explains what the main controls do, how they work together, and how to avoid common beginner mistakes.
You will learn:
- How to perform the cockpit drill with confidence
- What each pedal does and how to use them smoothly
- How the clutch works and why gear changes matter
- Where to find key hand controls and how to use them
- How to recognise common warning lights on the dashboard
- Practical tips to build confidence before you move off
Cockpit Drill and Seating
Do your cockpit drill before every lesson while the car is parked. A good setup helps you reach everything without stretching and keeps your view clear.
Seat Position
- Distance: slight bend in your knees with feet on the pedals
- Height: clear view of the road and the dashboard
- Backrest: upright and supported, not reclined
Steering Wheel and Head Restraint
- Adjust reach so your arms are slightly bent at the wheel
- Set the head restraint level with the top of your head
- Keep your shoulders relaxed for smoother steering
Mirrors
- Interior mirror: centre the rear window in the frame
- Door mirrors: see the horizon and a sliver of your car
- Reduce blind spots without tilting your head
Cockpit Drill Checklist
- Doors closed and secure
- Seat adjusted and head restraint set
- Steering wheel positioned comfortably
- Seatbelt on, flat, and not twisted
- Mirrors set for full rear and side coverage
Pedals and Feet
Foot control affects every movement of the car. Keep your feet relaxed and use smooth, progressive pressure rather than sudden taps.
Manual Pedal Layout
- Clutch on the left, brake in the middle, accelerator on the right
- Right foot operates brake and accelerator only
- Left foot rests on the footrest when not using the clutch
Automatic Pedal Layout
Automatics have two pedals: brake (left) and accelerator (right). Use your right foot for both to avoid accidental braking.
Smooth Braking and Foot Habits
- Brake progressively so the car slows without jolting
- Do not hover on the clutch or brake; it causes wear and makes control jerky
- Keep your heel lightly anchored to help control pressure
Gears and Clutch Basics
In a manual car, the clutch connects and disconnects the engine from the wheels so you can change gear smoothly. Automatics handle the clutch for you, but it still helps to understand the basics.
What the Clutch Does
Pressing the clutch breaks the link between engine and wheels. This lets you select a gear without grinding and helps you move off smoothly.
Why You Change Gear
Lower gears give more power at low speeds; higher gears keep the engine calm as speed increases. Changing at the right time avoids over-revving.
Simple Moving-Off Routine
Clutch down fully and select first gear.
Find the bite point as you lift the clutch slowly.
Add gentle gas and hold the bite.
Release the clutch smoothly as the car moves.
Avoiding Stalls
Stalling usually happens when the clutch comes up too quickly or there is not enough gas. Slow the clutch, pause at the bite, and keep the revs steady.
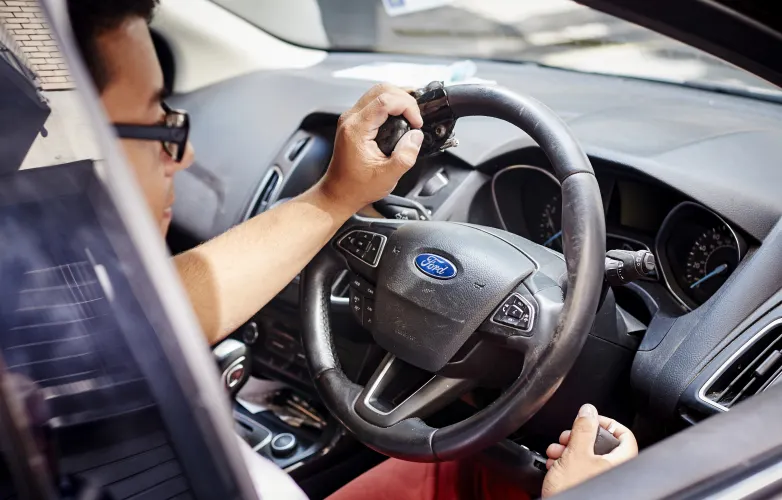
Steering and Hand Controls
Steering should feel steady and relaxed. The goal is smooth, accurate control rather than rigid hand positions.
Steering Basics
- Keep hands balanced and comfortable, around 9 and 3
- Use controlled hand-over-hand or push-pull, not wild crossing
- Guide the wheel back rather than letting it spin freely
Core Hand Controls
- Indicators and headlights sit on the stalks behind the wheel
- Handbrake/parking brake keeps the car secure when stationary
- Horn is for safety, not frustration
Dashboard and Warning Lights
Your dashboard tells you how the car is performing. Learn the main dials first, then focus on the key warning symbols.
Main Dials
- Speedometer shows your speed
- Rev counter helps you judge gear changes
- Fuel gauge and temperature gauge keep you aware
Warning Lights to Recognise
- Oil pressure
- Battery/charging
- Engine management
- Brake warning
- ABS
- Tyre pressure (if fitted)
If a warning light stays on or appears while driving, tell your instructor and do not ignore it.
Mirrors, Signals, and Wipers
These controls help you communicate and see clearly. The easier they are to find, the more confident you will feel in busy traffic.
Indicators and Signalling
- Signal early so others can react
- Check cancellation after turns and roundabouts
- Match your signal to your lane choice
Wipers, Washers, and Demisters
- Use intermittent or faster settings as rain increases
- Washer jets clear grime when visibility drops
- Front and rear demisters clear mist quickly
Lights: Dipped vs Main Beam
Dipped headlights are your default for low light. Main beam gives extra reach on unlit roads but must be dipped for oncoming traffic or vehicles ahead.
Practice Tips
Short, calm practice sessions make a big difference. Use parked time to build confidence before your next lesson.
Sit in the parked car and name each control out loud
Quiz yourself: pedals, stalks, hazard lights, handbrake, demisters
Repeat the cockpit drill until it feels automatic
Ask your instructor to explain any warning light you notice
Reflection Questions
- Could I reach every control without stretching?
- Did I keep my feet relaxed and off unused pedals?
- Do I know where the wiper, light, and demister switches are?
Common Mistakes and How to Avoid Them
Sitting too close or too far
Re-check your seat so your pedals and steering are easy to reach.
Mirrors not set properly
Take time to reduce blind spots before moving off.
Riding the clutch
Rest your left foot on the footrest once the gear is selected.
Looking at the gear stick too long
Glance briefly and return your eyes to the road.
Forgetting to cancel indicators
Build a habit of checking after every turn.
Frequently Asked Questions
What is the cockpit drill?
It is a quick routine for setting up the car: doors, seat, steering, seatbelt, and mirrors. It makes sure you are safe and comfortable before moving off.
How do I know if my seat is in the right position?
You should be able to fully press the pedals with a slight bend in your knees and reach the wheel with relaxed arms. You should also see clearly over the dashboard.
Where should my feet be when I am not changing gear?
In a manual, rest your left foot on the footrest and keep your right foot over the brake or accelerator as needed. In an automatic, rest your left foot on the footrest and use your right foot for both pedals.
What causes stalling and how do I stop it?
Stalling usually happens when the clutch comes up too quickly or there is not enough gas. Slow your clutch, pause at the bite, and add gentle power.
Do I need to look at the gear stick?
A quick glance is fine at first, but try to return your eyes to the road. Over time, your hand will learn the pattern without looking.
What should I do if a warning light comes on?
Tell your instructor straight away. Do not ignore warning lights, especially red ones, as they can signal a serious issue.
What is the difference between dipped and main beam?
Dipped headlights light the road without dazzling others. Main beam is brighter and is only for dark, unlit roads when no one is ahead or coming towards you.
When should I use demisters?
Use them when the windscreen or rear window starts to fog. Clear vision is essential, even if the mist is light.
How do I stop forgetting my indicators?
Build a habit: check the indicator stalk after every turn or roundabout. Your instructor can prompt you until it sticks.
Is learning in an automatic easier?
Many learners find automatics simpler because there is no clutch or gear changes. However, you still need strong observation and planning skills.
What if I drive a different car?
Controls can vary between models. Take a moment to locate the pedals, stalks, and switches before you move off.
Next Steps
Now that you're familiar with all the controls, let's master the essential skills of moving off and stopping safely.